Spooktacular DIY: How to Create the Perfect Halloween Funny Tombstone Box for Friends and Family
Halloween is one of the most anticipated holidays of the year, offering a unique opportunity to blend creativity with community spirit. Whether you are hosting a neighborhood party, organizing an office celebration, or simply looking for a charming way to share treats with loved ones, handmade decorations add a personal touch that store-bought items often lack. Among the myriad of DIY projects available, the Funny Tombstone Box has emerged as a standout favorite. This versatile craft project allows you to create adorable, medium-sized containers perfect for gifting candy, small gifts, or gift cards.
In this guide, we will explore everything you need to know about creating these delightful tombstone boxes, from understanding their design features to mastering the digital cutting process. By the end of this article, you will be equipped with the knowledge to produce professional-looking Halloween favors that are sure to delight neighbors, coworkers, friends, and family alike.
Why Choose a Funny Tombstone Box?
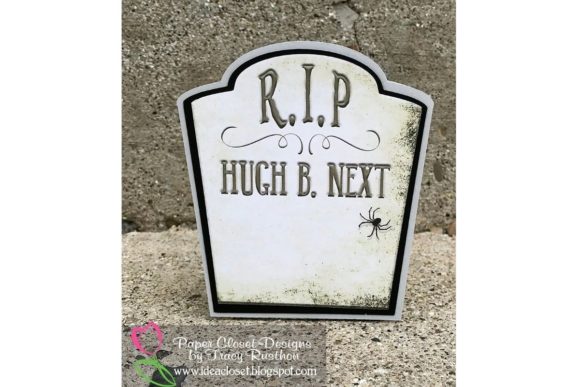
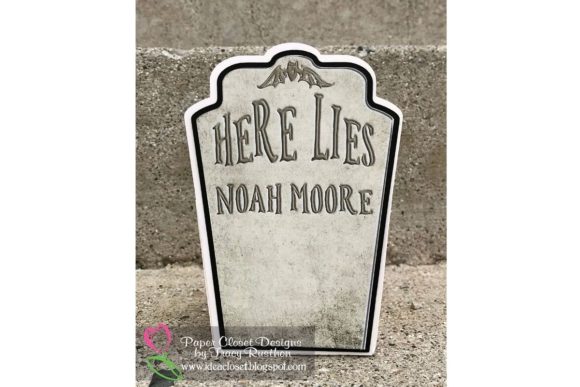
The appeal of the funny tombstone box lies in its combination of humor, convenience, and customization. Unlike traditional pumpkin buckets or generic treat bags, a tombstone-shaped container offers a playful nod to the spooky season while remaining light-hearted and fun. The "funny" aspect typically comes from customizable text on the front panel, allowing you to insert puns, inside jokes, or witty phrases that resonate with your specific audience.
Furthermore, the medium size of the box—measuring approximately 4.5 x 6.5 inches—makes it incredibly practical. It is large enough to hold a generous amount of treats but compact enough to fit easily into hands, mailboxes, or party favor baskets. This dimension strikes the perfect balance between substance and portability, making it ideal for various social settings.
Versatility in Gifting
One of the primary reasons enthusiasts love this project is its versatility. While traditionally associated with Halloween candy, the box serves as a creative vessel for a wide array of gifts:
- Sweet Treats: Fill it with chocolate bars, lollipops, or individually wrapped candies for a classic Halloween surprise.
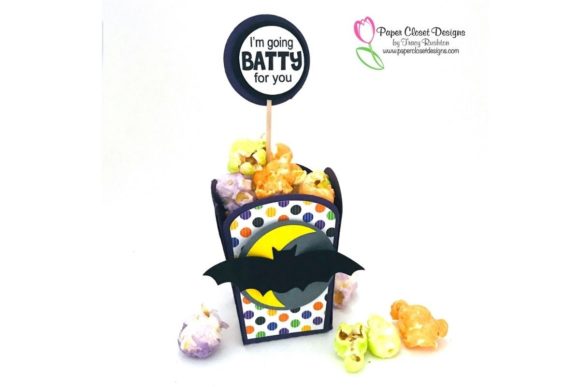
- Snacks: Popcorn, nuts, or trail mix offer healthier alternatives that still feel festive.
- Gift Cards: Slide a Starbucks or Amazon gift card into the box for a more substantial present.
- Small Gifts: Consider adding small toys, jewelry, or self-care items like bath bombs for a personalized touch.
This adaptability ensures that the tombstone box is not just a seasonal decoration but a functional gift container that can be used throughout the fall season.
Understanding the Digital File Format
To bring your tombstone box to life, you will need access to the correct digital files. Modern crafting relies heavily on digital cutters such as the Cricut Design Space, Silhouette Cameo, and Brother ScanNCut. These machines require specific file formats to interpret designs accurately.
The product description highlights a comprehensive package that includes:
- Layered Panels: The structural components needed to assemble the 3D box.
- Printable Front Panel: A dedicated space for adding your custom humorous text or graphics before cutting.
- Blank Front Panel: An alternative option if you prefer to hand-write messages or use stickers.
When purchasing or downloading these files, ensure they come in a zipped folder containing multiple formats: SVG (Scalable Vector Graphics), GSD (Silhouette Studio Design), DXF (Drawing Exchange Format), PNG (Portable Network Graphics), and native Design Space files. Having these varied formats ensures compatibility regardless of which cutting machine you own or whether you plan to cut by hand.
What Do These Formats Mean?
For beginners, navigating file types can be confusing. Here is a brief breakdown:
- SVG: The most common format for Cricut users. It allows for infinite scaling without losing quality.
- DXF: Often used by Silhouette users, though many modern machines can import DXF files seamlessly.
- PNG: A raster image format useful for printing templates or visualizing the design before cutting.
- GSD: Specific to Silhouette Studio software, ensuring precise layering for complex cuts.
By including all these formats, the creator ensures that every crafter, regardless of their hardware, can participate in the fun.
Step-by-Step Assembly Guide
Creating the tombstone box is a straightforward process, even for those new to paper crafting. The included PDF instructions serve as both a guide and a template, providing clarity at every stage.
Step 1: Preparation
Begin by unzipping your download folder and opening the PDF instructions. If you are using a digital cutter, upload the appropriate file type (SVG or DXF) into your software. If you are cutting by hand, print the PDF template directly onto cardstock. Ensure your material is sturdy; heavy-weight cardstock or scrapbooking paper works best to maintain the box’s shape.
Step 2: Cutting the Panels
Load your material into your cutting machine according to the manufacturer’s guidelines. Set the blade depth and pressure correctly to ensure clean cuts without damaging the mat. Cut out all the layered panels. Remember to separate the layers carefully, especially if you are using colored cardstock to create a dimensional effect.
Step 3: Adding the Personal Touch
This is where the magic happens. If you chose the Printable Front Panel, open the accompanying graphic file in a design program or printer-friendly editor. Add your funny text here—perhaps a pun like "R.I.P. My Diet" or "Ghouls Just Want to Have Fun." Print this panel onto high-quality paper. If you opted for the Blank Front Panel, use markers, paint pens, or stamps to decorate it yourself.
Step 4: Assembly
Follow the step-by-step PDF instructions to fold and glue the panels together. Most tombstone boxes feature interlocking tabs or adhesive flaps. Be patient during this stage; precision ensures the box stands upright and holds its contents securely. Once assembled, test the structure by gently pressing on the sides to ensure stability.
Step 5: Filling and Gifting
Your box is now ready! Fill it with your chosen treats. For a polished look, consider adding a ribbon around the base or attaching a small tag with the recipient's name. Distribute them to neighbors, leave them in coworker cubicles, or hand them out at parties.
Practical Applications in Modern Life
The Funny Tombstone Box is more than just a craft; it is a tool for connection. In today’s fast-paced world, taking the time to create something by hand demonstrates care and effort. It fosters community engagement, whether through door-to-door greetings or office celebrations.
For educators, this project can serve as an excellent classroom activity, teaching students about geometry, measurement, and digital literacy. For small business owners, these boxes can be branded with logos to create memorable promotional giveaways during the holiday season. The ability to customize the front panel means that the message can be tailored to any demographic, making it a universally appealing gift.
Common Misconceptions and Tips
A common misconception is that digital cutting requires expensive, professional-grade equipment. However, many home users possess affordable cutters like the Cricut Maker or Silhouette Cameo, which are fully capable of handling these designs. Additionally, some may assume that "printable" implies complex printing setups. In reality, standard home printers work perfectly fine for the front panels.
Another tip for success: always do a test cut on scrap paper first. This helps you verify that the alignment is correct and that the text is legible before committing to your final materials. Also, consider the weight of your fillings; heavier items like gift cards may require additional reinforcement at the bottom of the box to prevent sagging.
Conclusion
The Halloween Funny Tombstone Box represents the perfect intersection of technology, creativity, and tradition. With its user-friendly digital files, versatile design, and endless customization options, it offers a rewarding crafting experience for hobbyists of all skill levels. By following the provided instructions and utilizing the included layered panels, you can create charming, medium-sized boxes that spread joy and laughter this Halloween season.
Whether you are sharing a laugh with a neighbor over a bag of popcorn or surprising a coworker with a sweet treat, these tombstone boxes provide a memorable way to connect. Embrace the spooky spirit, unleash your creativity, and enjoy the satisfaction of giving a gift that is uniquely yours. Happy crafting!